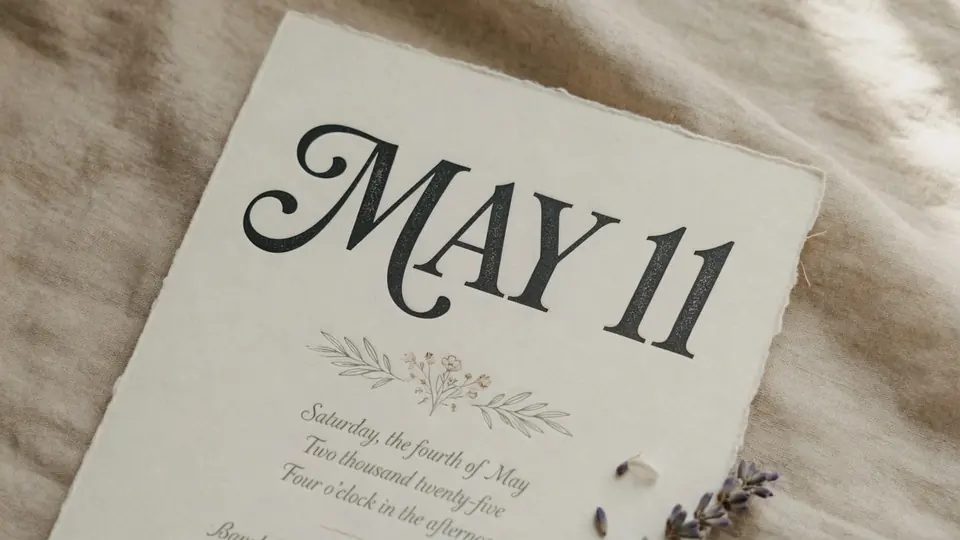
I sat staring at an elegant textured stationery card on my monitor late on a Friday evening. The gold foil shimmer looked stunning, but the bold header still read "SAVE THE DATE" instead of our hosts' requested phrase: "JOIN US SAT". I had no layered working project, only a flattened high-resolution export saved on my desktop.
If you have ever organized a celebration, you know how often guest timelines shift at the eleventh hour. A sudden schedule adjustment means an approved graphic needs a minor phrase modification before digital distribution. Finding yourself stranded with an uneditable image file can turn a simple announcement into an unnecessary headache.
Before you upload anything to an image manipulation tool, verify whether your master project remains accessible. If your card was assembled in Canva, Illustrator, or an editable digital template service, return to that original workspace immediately. Adjusting a native text frame retains clean vector curves far better than painting over rasterized pixels.
ReWords AI exists specifically for situations where those source archives are completely lost or never shared with you. When an event coordinator hands you a flat graphic file, you must treat the artwork as fixed pixels rather than editable text boxes. In that scenario, our dedicated Invitation Text Editor allows you to swap out typographic phrases directly across the surface of the picture.
Altering text on an invitation graphic requires a different approach than conventional photo editing. Traditional cloning brushes blur out paper grain, destroy linen textures, and leave awkward smudges where crisp lettering once lived. Raster editing models attempt to study the surrounding card stock, lift the existing characters, and paint replacement letterforms that emulate the surrounding lighting and ink distribution.
Because this process evaluates pixel patterns rather than installing font files, the output represents a visual best-effort match rather than a mathematically identical font replica. You will not get a lossless vector file back, nor will you receive an exported typeface package. What you receive is a newly synthesized raster image that blends your entered words into the visual atmosphere of the original stationery.
Invitation Text Editor
Edit host names or blank out cancelled registry notes on finished cards.
Step-by-Step Guide to Updating Your Invitation Card
Step 1: Upload the Static Invitation Card
Begin by dragging your flattened graphic file into the upload module on the interface. The tool accepts static raster formats, specifically standard PNG, JPG, and WebP files. Make sure you avoid uploading animated media, PDF bundles, or corrupted mobile screengrabs, as the system only processes single-frame pictures.
I always recommend uploading the highest-clarity export you can find in your email threads or photo library. Heavy compression artifacts and digital blur around serif letterforms make boundary identification harder for the optical reader. Starting with clean, high-resolution stationery ensures the model can read the edges of "SAVE THE DATE" without confusing letter stems with background watercolor splatters.
Step 2: Review the Detected Text Line
Once the image loads into your workspace, the system runs an automated optical scan across the canvas to locate typography. Running this detection phase does not consume your account credits, allowing you to confirm that the text block was properly isolated before committing any balance. You will see bounding boxes highlight the detected phrases across the invitation.
Find the bounding frame containing "SAVE THE DATE" and select it to inspect the recognized words. If your invitation contains surrounding lines you want to safeguard from accidental regeneration, you can activate the Lock feature on each identified line to freeze it completely. If there is a line of text you wish to delete entirely, you can simply clear its input field and leave it blank to remove it from the composition.
Step 3: Type Your New Phrase
Now, click into the active text input box that corresponds to the header you wish to replace. In our working example, erase the words "SAVE THE DATE" and manually type "JOIN US SAT" into the prompt field. The engine does not guess what wording you want or pull from generic event presets; you must type the exact characters and capitalization you wish to display.
Take a moment to evaluate the character length of your new phrase compared to the old one. "JOIN US SAT" contains eleven characters including spaces, whereas "SAVE THE DATE" contains thirteen. Because the space allocated on an invitation header is physically restricted, keeping your replacement phrase close to the original length helps preserve balanced margins, and ensuring abbreviations like "SAT" match the formal tone helps the card look intentional.
Step 4: Choose Resolution and Credit Allocation
After typing your replacement phrase, you will choose your generation resolution tier before rendering the final image. ReWords AI operates on a balance system where you receive complimentary trial credits upon signing into your profile, with no unlimited free usage tier and no bulk automation API. You can review your balance right beside the export settings before confirming the job.
The credit cost scales directly with your chosen canvas output clarity: 1K resolution costs 10 credits, 2K resolution costs 20 credits, and 4K resolution costs 30 credits. For digital messaging cards shared via family chat groups, a standard 1K render is often adequate. If you intend to share the graphic on a wedding registry website or print a keepsake copy, selecting 2K or 4K preserves the sharp definition of the newly painted characters. Selecting your tier deliberately avoids burning credits on unnecessary canvas sizes for casual gatherings.
Step 5: Generate and Review the Rendered Pixels
Confirm the generation to allow the synthesis engine to clear the original words and paint "JOIN US SAT" onto the stationery. When the render completes, zoom into the revised area to inspect the interaction between the new letterforms and the card background. The system works to harmonize the color tone, grain, and ambient shadow of the fresh lettering with the rest of the artwork.
Compare the new heading against the secondary lines on the card to make sure the visual hierarchy remains intact. If you need to refine the wording or adjust another line on the card, you can continue through our Edit Text on Invitation workflow to fine-tune the composition. Be sure to view the downloaded graphic at full scale on both desktop and mobile screens to confirm legibility. Once the visual layout meets your standards, save the static image back to your local drive for distribution.
Managing Typography Across Social Gatherings
Invitations serve as the primary communication bridge for major social gatherings, from intimate dinners to large formal ceremonies. When schedules change unexpectedly, hosts often experience stress trying to reach every guest with accurate details. Having a reliable method to Edit Text in Image files eliminates the panic of needing an emergency designer just to update an arrival window or RSVP date.
Whether you are coordinating an anniversary banquet, a graduation party, or a formal reception, clear typography prevents guest confusion. When distributing digital cards across email or messaging platforms, recipients focus primarily on the clarity of the dates and times. Taking the time to verify that your replaced lettering reads clearly against the background texture ensures your announcement serves its core hospitality function.
Practical Tips for Cleaner Results
To achieve the cleanest possible results, spend thirty seconds checking your image file before beginning the process. Crop away unnecessary border frames or screenshot navigation bars that might distract the optical detection engine. If your card photo was taken with a smartphone camera, ensure the lighting across the paper is relatively even without harsh finger shadows.
Avoid running images through aggressive compression filters before uploading them to the platform. Compressed JPG files often develop faint halo artifacts around dark letters, which can interfere with the system's ability to cleanly extract the original characters. By feeding the workspace a sharp, unblemished graphic, you give the synthesis engine the best foundation for painting natural replacement typography.
The Bottom Line
When you only have a flattened image of an invitation card, altering the wording requires working directly on pixels. Always check for original source files first, but rely on raster synthesis when those project files are permanently out of reach. By locking unaffected lines, typing exact replacement text, and choosing the appropriate resolution tier, you can update essential details smoothly.
ReWords AI provides a focused way to refresh dates, names, and headings on static stationery without demanding design expertise. Remember that the system provides visual best-effort matching rather than native font files, and manage your credit tiers based on your intended display format. With these principles in mind, updating your event graphics becomes a straightforward task rather than an administrative hurdle.
Sources
- https://en.wikipedia.org/wiki/Wedding
- https://en.wikipedia.org/wiki/Party
- https://en.wikipedia.org/wiki/Engagement