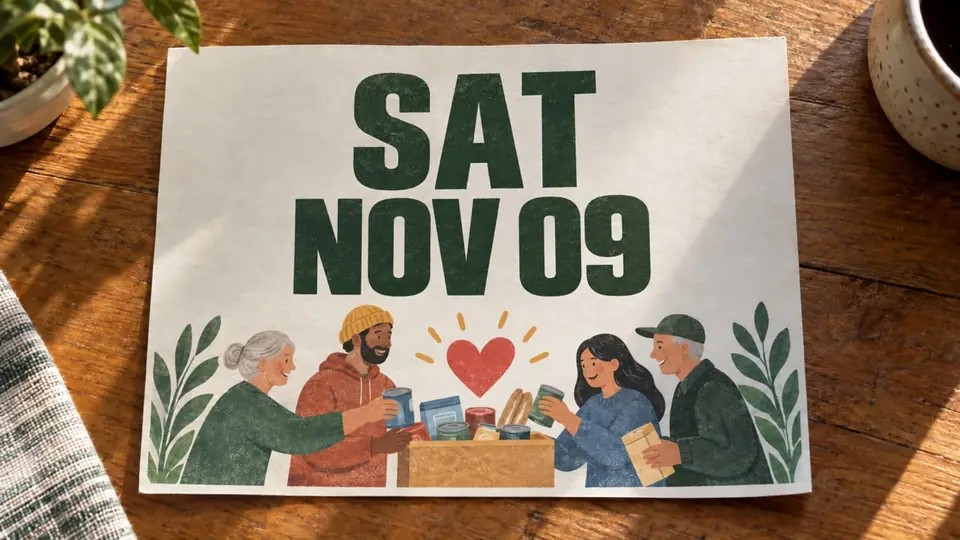
I remember staring at my screen late on a Tuesday night with a heavy knot in my stomach. The promotional campaign was scheduled to roll out the following morning, but the headline act informed us that their flight was cancelled. The date printed directly across the center of our promotional poster read SAT OCT 12 in bold capital letters, and it needed to say SAT NOV 09 instead.
The problem was that the agency that built the creative assets had already shut their laptops for the night. I only had access to the final flattened export sitting in my downloads folder. Every letter, shadow, and background grain was merged into a single layer of pixels.
Flyer Text Editor
Modify schedule titles and delete unwanted words on finished promo flyers.
The First Rule: Check for the Native Project File
Before you touch any specialized raster tools, check whether you still have access to the original project. If your raw Figma board, Adobe Photoshop PSD, or original vector canvas is still accessible, open that project and modify the active type layer. That remains the cleanest path because native text boxes preserve font vectors, tracking values, and layer effects without touching surrounding artwork.
Many people assume they can take a flattened image and drop it into a standard online graphic platform to fix the wording. If you upload a flat raster export to Canva, the software treats the image as a single static picture. It will not magically convert flattened letters back into editable vector text boxes.
The Reality of Baked Pixels on Event Flyers
When you organize an event, print deadlines and social media schedules do not wait for a designer to reopen an archive. Flyers often combine noisy textured backgrounds, lighting flares, distressed typography, and complex gradients. Once an image is exported as a PNG, JPG, or WebP, those letters become permanent pixel values alongside the background art.
Traditional manual fixes require painting out old letters with clone stamps and searching font libraries for a matching typeface. That tedious workflow often leaves smudges across the background or introduces a font that looks slightly off. Using an AI-powered Flyer Text Editor allows you to target the baked letters directly on the flat graphic while reconstructing the background underneath.
If you are stuck with only a flat export, you need a workflow that treats the lettering as distinct visual shapes without destroying the underlying design. The goal is to swap the outdated information while preserving the lighting, grain, and color palette of the original artwork. To Edit Text on Flyer assets without rebuilding the entire canvas from scratch, follow these structured steps.
Five Steps to Update Text on a Flattened Flyer
Step 1: Upload the Flat Export
Begin by loading your flat graphic into the workspace. The tool accepts standard raster formats including PNG, JPG, and WebP. Once uploaded, the engine scans the visual canvas to detect typography clusters across your artwork.
You do not spend any credits during the initial detection pass. When you create an account and sign in, you receive trial credits to test the workspace on your files. This allows you to inspect how your layout is recognized before committing credits toward rendering an updated file.
Step 2: Select the Detected Line
After the scanning phase finishes, you will see bounding outlines highlighting the recognized lines of text. Click directly on the specific line that contains the outdated date. The interface isolates that detected row so you can modify its visual content.
The system operates at the level of detected text lines rather than broad pixel areas. Clicking the target line ensures that the replacement process focuses strictly on the characters you intend to change. Surrounding elements remain anchored to prevent accidental shifts in your layout.
Step 3: Type Your Replacement Characters Directly
Once the target line is active, an input field opens where you enter the replacement characters yourself. You type the exact wording you need, such as replacing SAT OCT 12 with SAT NOV 09. You maintain full control over spelling, punctuation, and capitalization because the system relies on your explicit input rather than automated suggestions.
If you need to remove a line entirely, leaving the input field blank erases that detected text from the final image. When you provide replacement words, the rendering model analyzes the visible shape, weight, color, and texture of the original characters. It then generates the new text to match that visual style as closely as possible within the scene.
Step 4: Lock the Unchanged Elements
An event flyer usually contains vital details surrounding the date, such as the venue name, door times, and ticket tiers. You do not want those details to drift, blur, or re-render during the generation pass. Look across your canvas and engage the Lock toggle on every line that must stay exactly as it is.
Remember that this Lock feature applies strictly to the detected lines of text within the interface, not to Photoshop layers. Locking a line tells the diffusion process to preserve those exact pixel arrangements without modification. This keeps your sponsor logos, address blocks, and pricing information crisp while only the date region updates.
Step 5: Choose Output Resolution and Compare
With your new text entered and non-target lines locked, select your desired output resolution. Rendering a 1K resolution image consumes 10 credits, a 2K render consumes 20 credits, and a 4K high-resolution asset requires 30 credits. Higher resolutions provide greater sharpness for print distribution, while standard resolutions work well for digital announcements.
When the generation finishes, place the new image side by side with your original graphic. Check the spacing, character alignment, and background integration around the altered date. If everything aligns with your visual standards, export the updated file and push it live to your promotional channels.
Understanding the Boundaries of Raster Text Editing
It helps to set realistic expectations about what modern visual models can and cannot do. When you use tools to Edit Text in Image assets, the engine performs a best-effort visual match of the typography style it sees in the pixels. It does not install an official desktop font file, extract vector outlines, or guarantee mathematically lossless output.
The system is designed for practical, single-asset corrections rather than programmatic production runs. There is no unlimited free generation tier, nor is there a high-volume batch API for processing thousands of files automatically. Knowing these technical realities prevents surprises and helps you plan your turnaround efficiently.
Preserving Visual Balance Across Dense Flyer Layouts
Event flyers frequently stack multiple pieces of information into tight physical margins. When you change an event date, the new wording may occupy a different physical width than the original phrase. If your original text read SAT OCT 12 and you change it to WEDNESDAY NOVEMBER 09, the extra characters might crowd neighboring graphic elements.
I always recommend keeping the character count and format as close to the original line as possible. Using standard abbreviations like SAT NOV 09 maintains the visual proportions that the designer originally established. This thoughtful adjustment helps the visual model render balanced spacing without squeezing the characters or overlapping nearby border art.
Inspecting Fine Details Before Distributing the Update
Once you download the altered flyer, perform a thorough inspection before printing posters or scheduling social posts. Zoom into the updated date line at full scale to evaluate the edges of the new letters. You want to confirm that the color tone, drop shadow, and surface texture match the neighboring unchanged headlines.
Compare the background immediately behind the edited letters against surrounding background regions. Look closely to ensure that underlying photo elements, paper textures, or neon glow effects transition smoothly across the bounding area. Catching minor visual inconsistencies during this inspection phase ensures that your audience sees a polished, professional promotion.
Handling Multiple Schedule Adjustments in Live Events
Live event management frequently introduces last-minute modifications that ripple across your marketing collateral. Beyond adjusting the primary calendar date, you might need to update door opening times, admission costs, or age restrictions. You can apply the exact same line-by-line editing approach to these secondary blocks of information on your flat image.
When dealing with multiple text updates on a single flyer, tackle them one logical section at a time. Locking lines that do not require changes keeps the rest of the composition completely stable throughout the process. This disciplined workflow prevents accidental drift across your venue information, ticket links, and sponsor banners.
The Bottom Line
When an event schedule changes, you do not need to panic if the original design file is nowhere to be found. If the native project exists, always return to your source layers first. When only a flat export is available, uploading the image, locking static text lines, and typing your replacement words provides a practical way forward.
Sources
- https://zhuanlan.zhihu.com/p/2065449081007346078
- https://www.zhihu.com/question/29496489
- https://www.zhihu.com/question/657445134
- https://en.wikipedia.org/wiki/Flyer_(pamphlet)
- https://en.wikipedia.org/wiki/Handbill
- https://en.wikipedia.org/wiki/Event_management